김치 Kimchi

This is how I make kimchi. My two year old calls it “kimpachi.” He doesn’t like it yet. Maybe when he’s older he will. It’s too spicy for him now. Here’s the youtube video I learned (and adapted) from: Maangchi’s Kimchi Regular kimchi is made with the entire head of napa cabbage quartered instead of chopped, but this is “mak” kimchi, which is easier and quicker.

It takes a bit more than an hour and a half to prepare, and seven or so days to ferment, although you can eat it as soon as you make it. 🙂

A big head of napa cabbage ready to chop up

Ingredients:

Napa cabbage

Kosher (or other coarse) salt

Fish sauce and/or soy sauce

Water

Starch (I use corn starch but you can use rice flour or even white flour.)

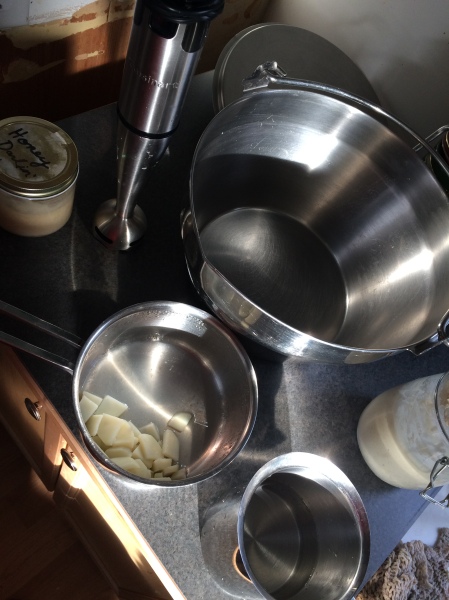
Vegetables: Garlic, green onion, carrot, radish, ginger. Other options I often use: red sweet pepper, kohl rabi, celery.

Spices: hot red pepper flakes, powdered cayenne pepper, paprika

Sesame seeds (optional)

Large glass jars or other appropriate containers with fairly tight fitting lids. (I wouldn’t be inclined to use metal, wood or plastic.)

First, chop the cabbage. Cut a little off the bottom where it’s a bit nasty. Then with a good sharp knife cut a slit about two or three inches deep across the middle of the bottom. Then gently pull the entire head in half. Do the same with each half, so you will have quartered the cabbage.

Next, slice each quarter of the cabbage lengthwise, about an inch or 1-1/2″ apart, without cutting into the core- so all the leaves will be more or less still attached. Then slice them the other way, about an inch wide, and put it in a huge bowl or pot, or as I do, in a clean kitchen sink. Then rinse all of it with water and let it drain for a few minutes.

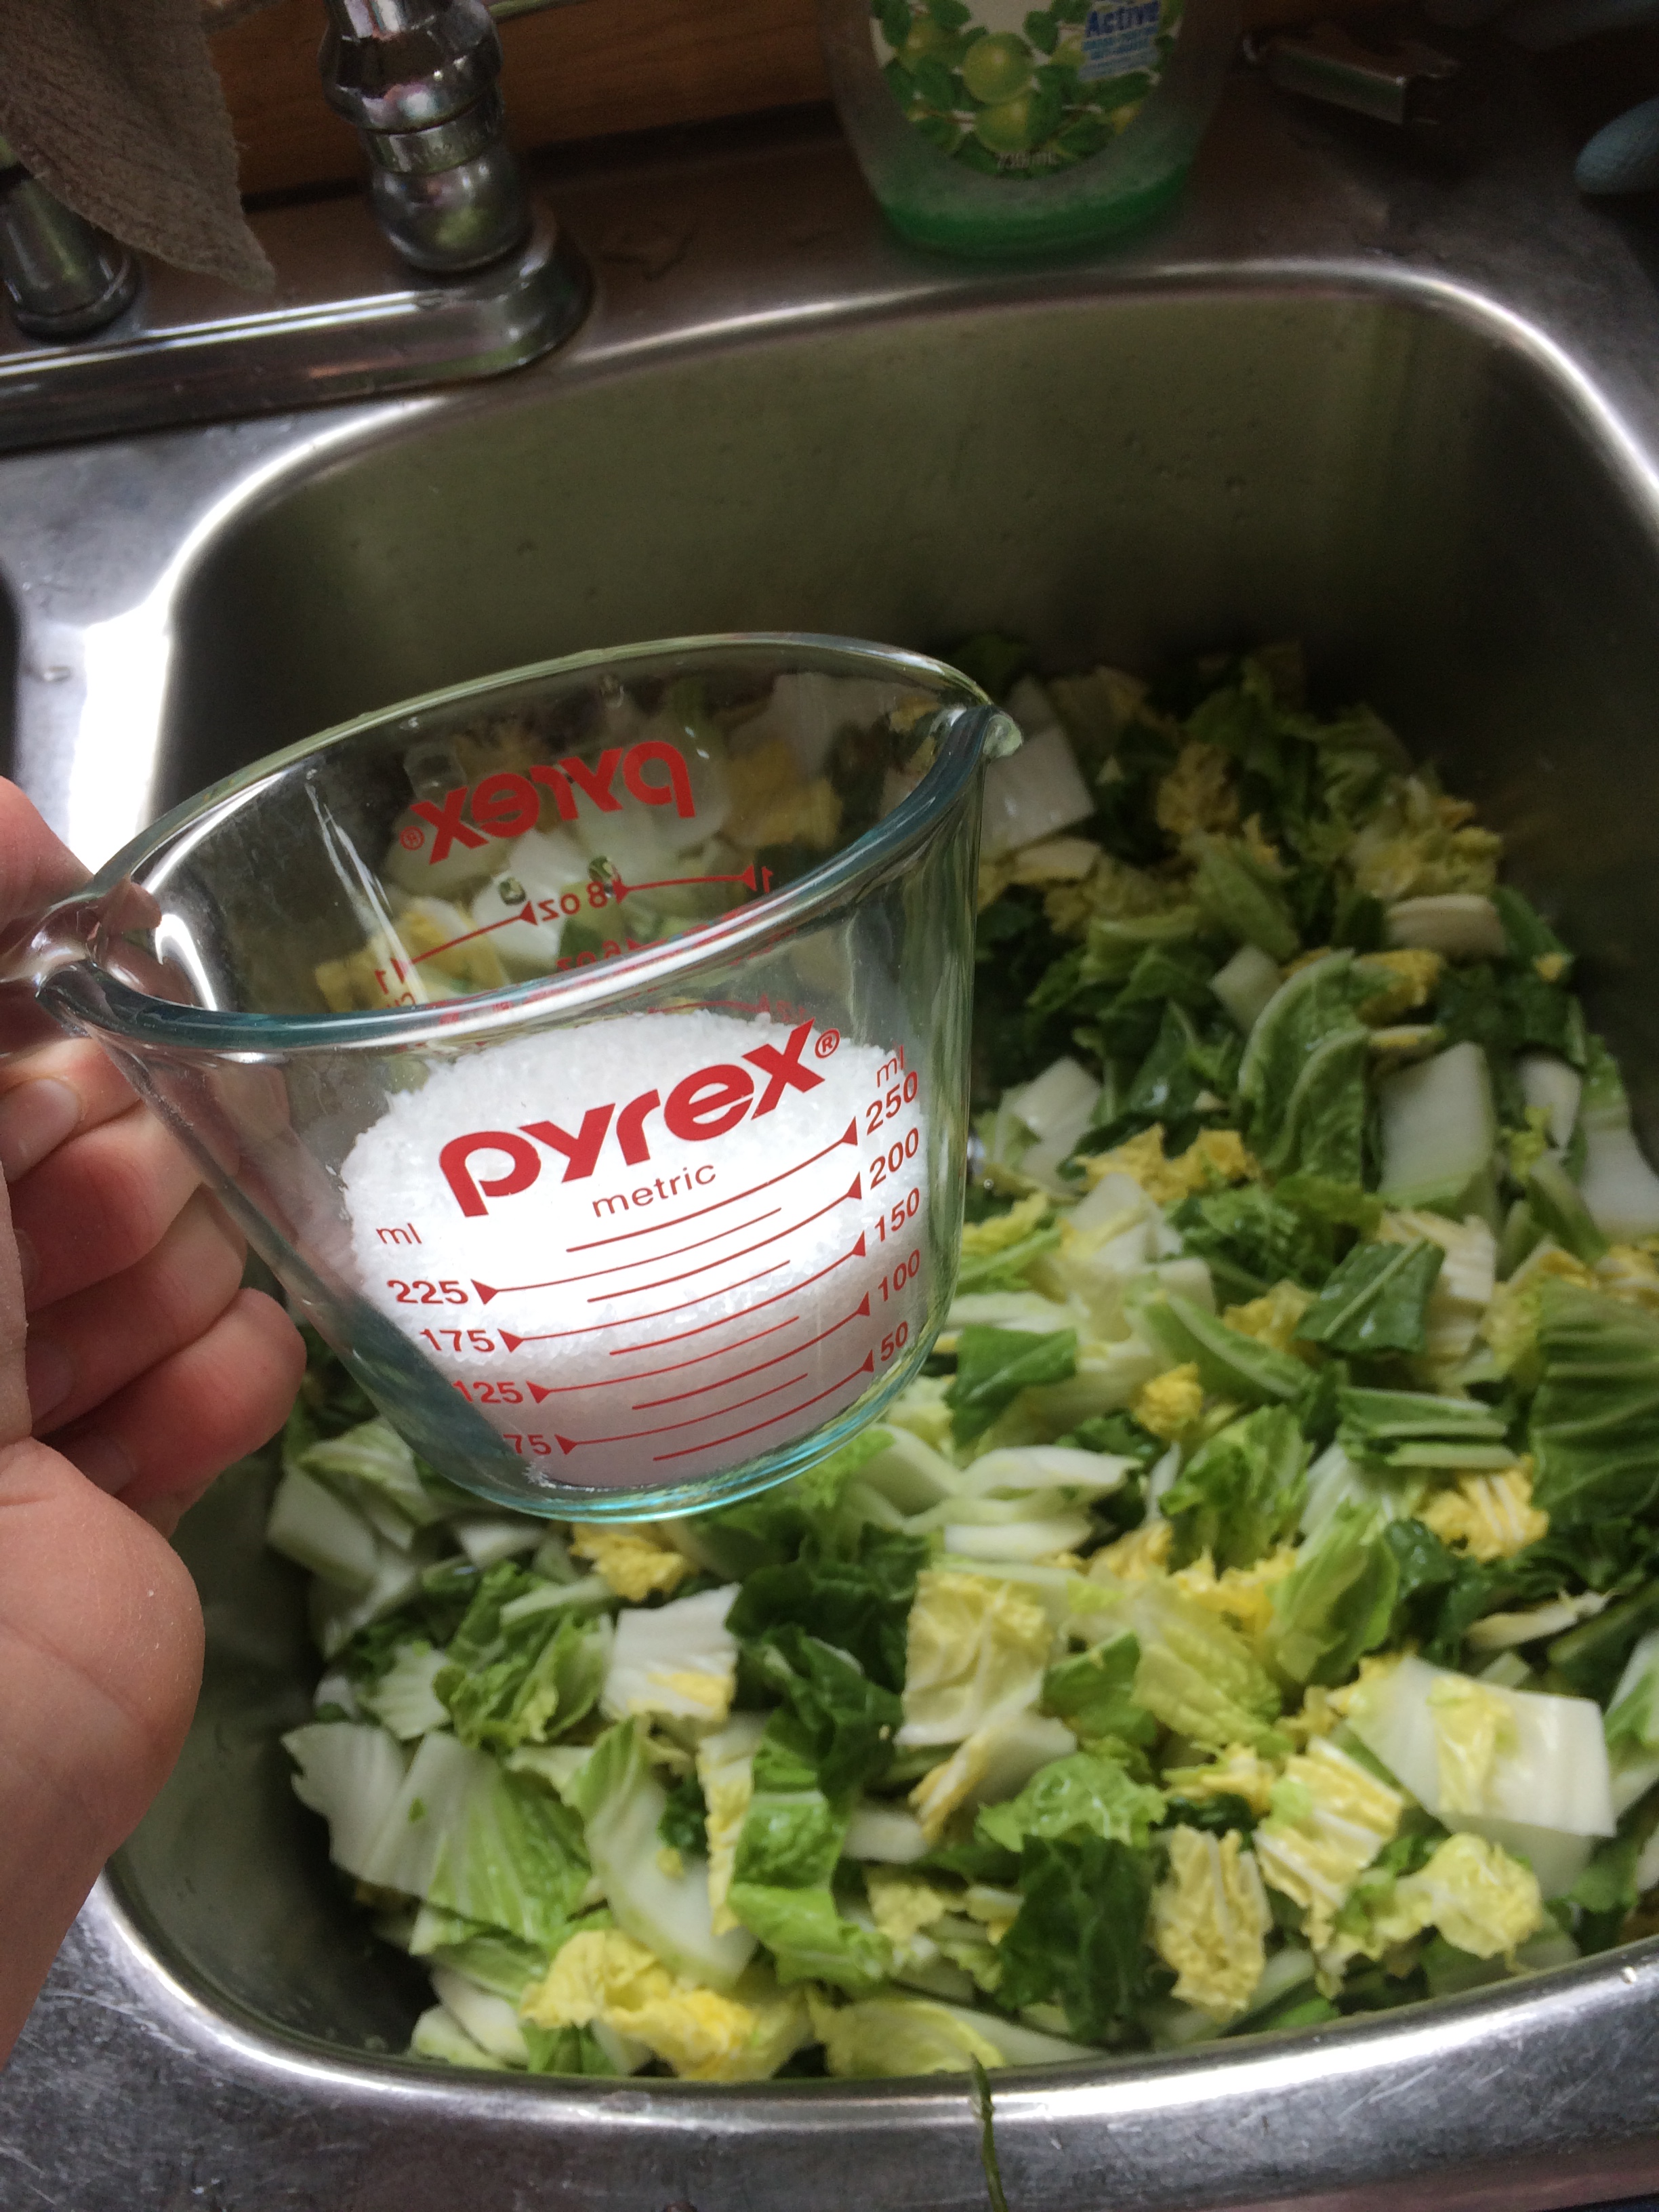
Once it has drained, close the drain (or at least have it in a bowl or pot) and sprinkle all the cabbage with the coarse salt- at a ratio of about one cup of salt to 10 lbs of cabbage. Mix it well.

Set a timer for half an hour.

At the end of half an hour mix the cabbage and salt thoroughly with your hands.

Set the timer for a second half hour.

At the end of the second half hour stir it again.

Set the timer for the third half hour.

At the end of the third half hour the cabbage will have shrunk a lot and absorbed a lot of the salt. In the meantime…

While the cabbage and salt are sitting for the hour and a half, make the “porridge” and chop the rest of the vegetables.

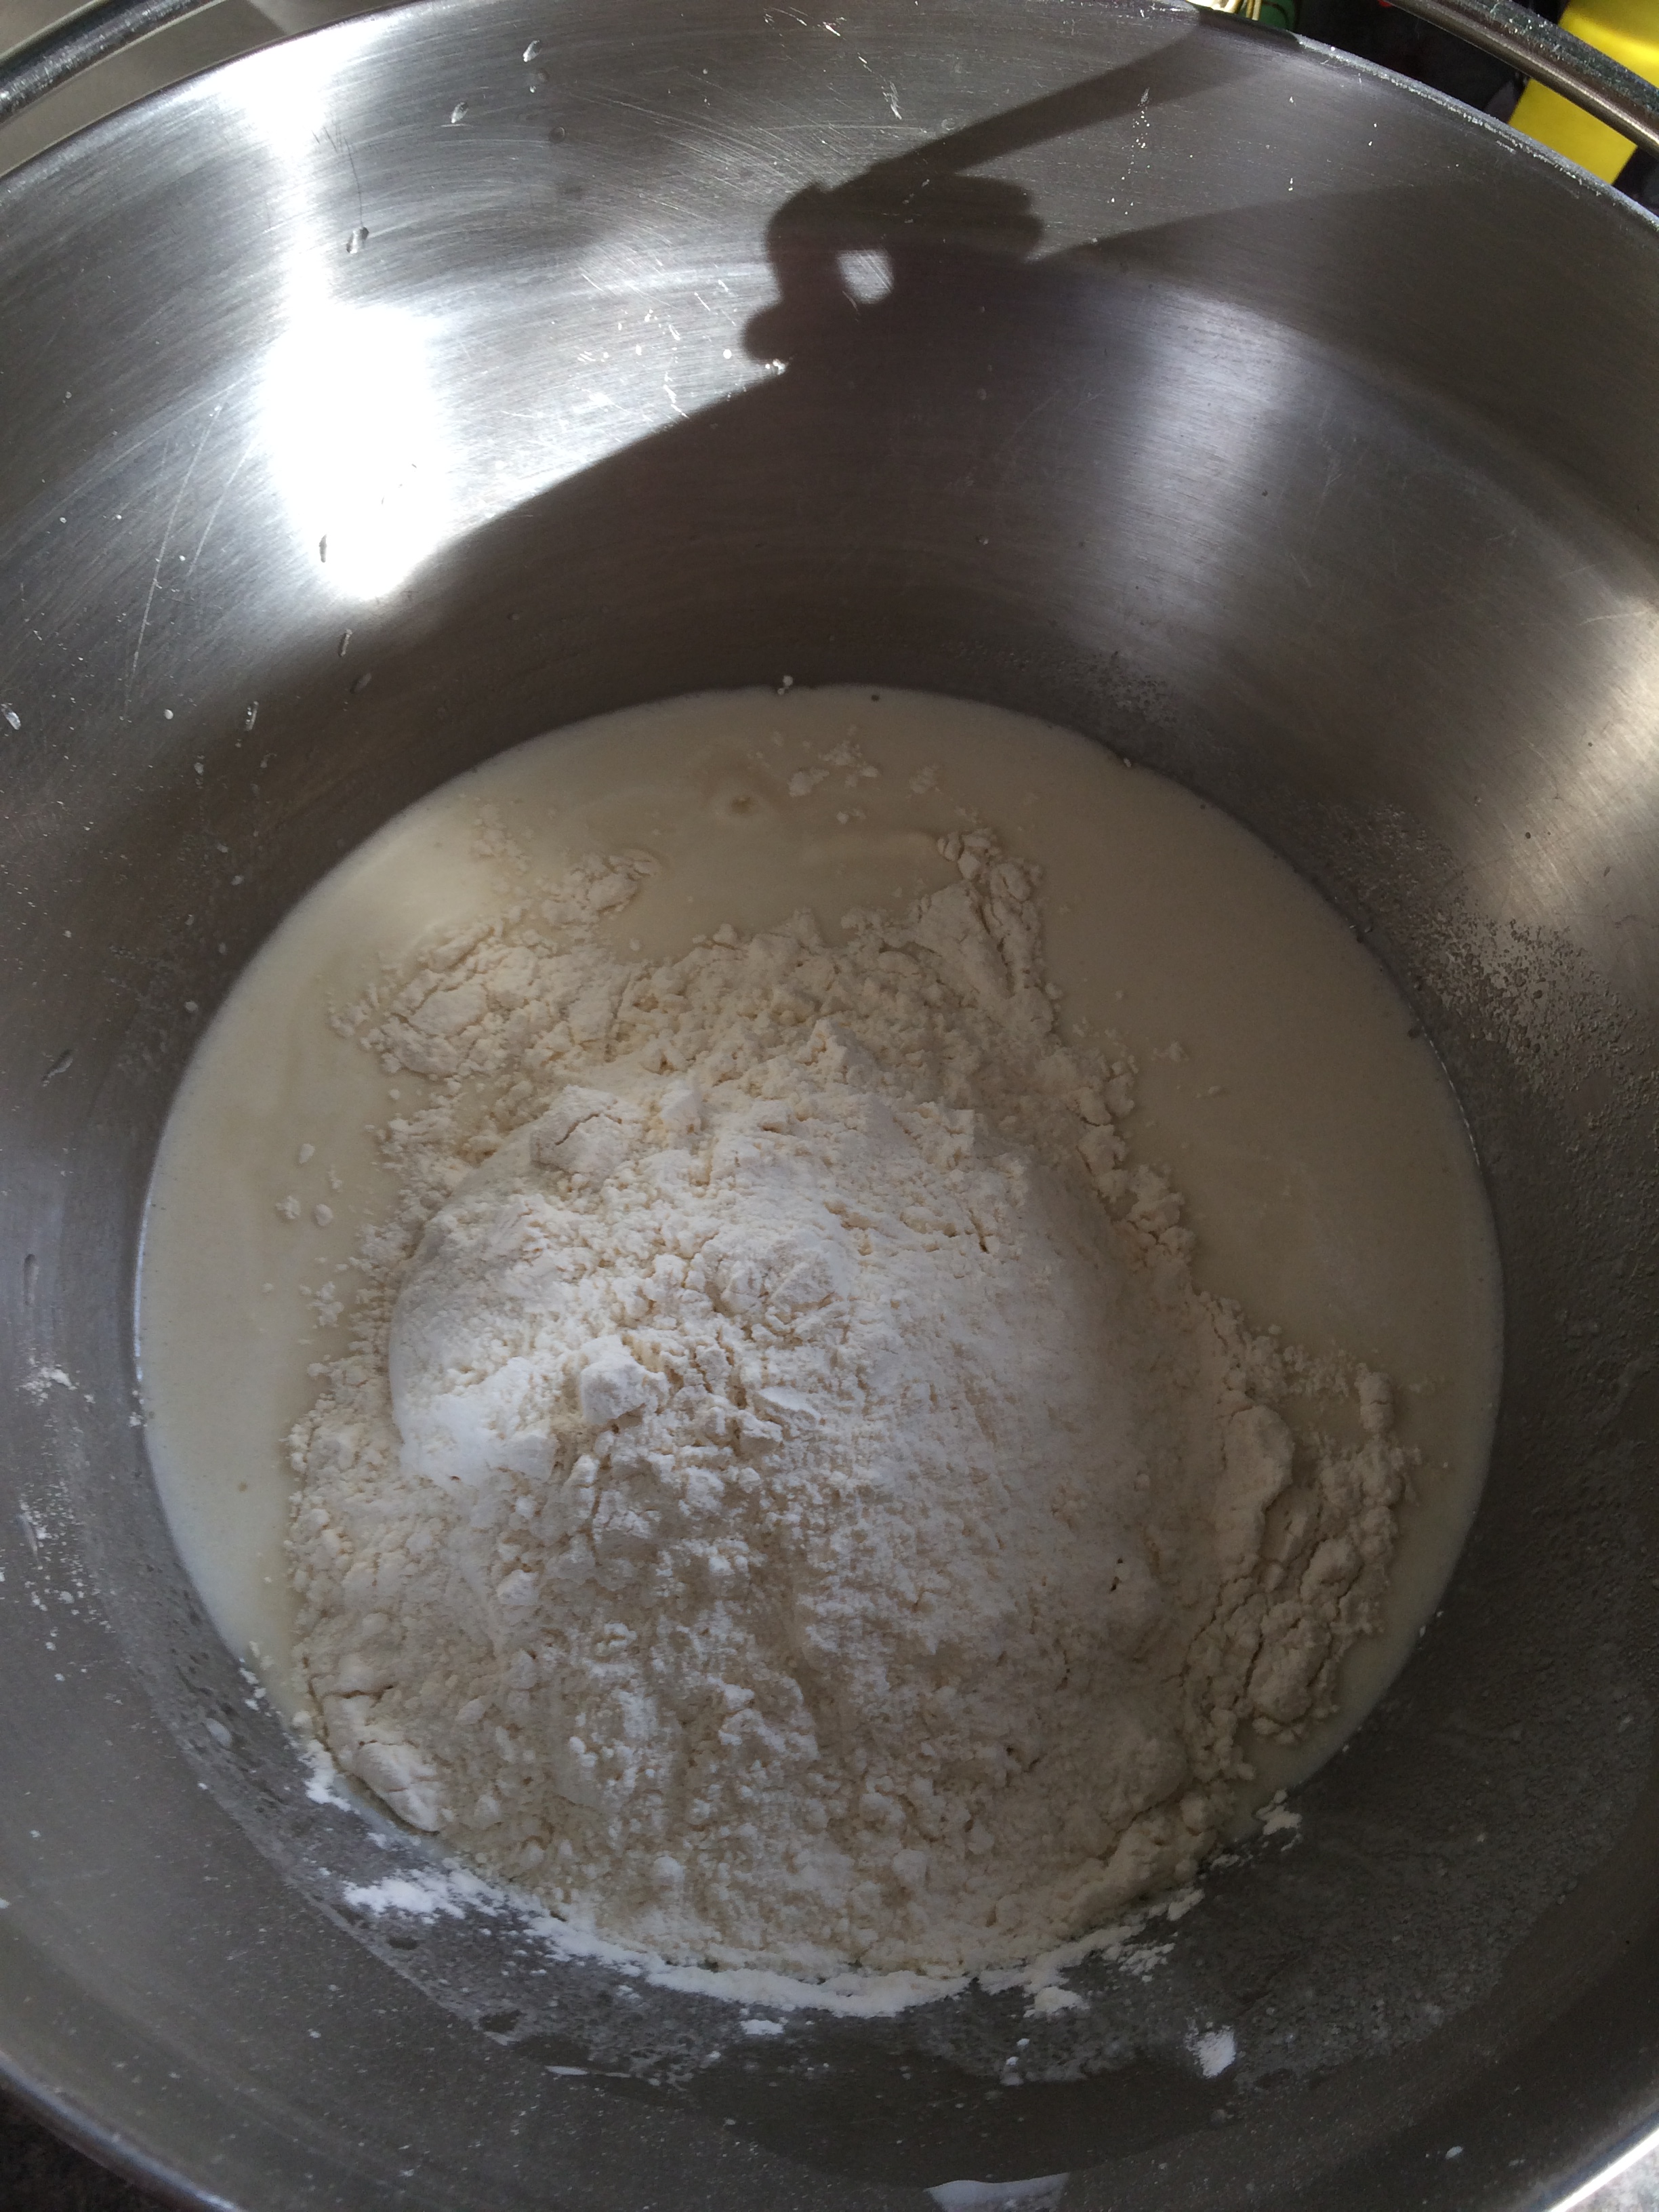
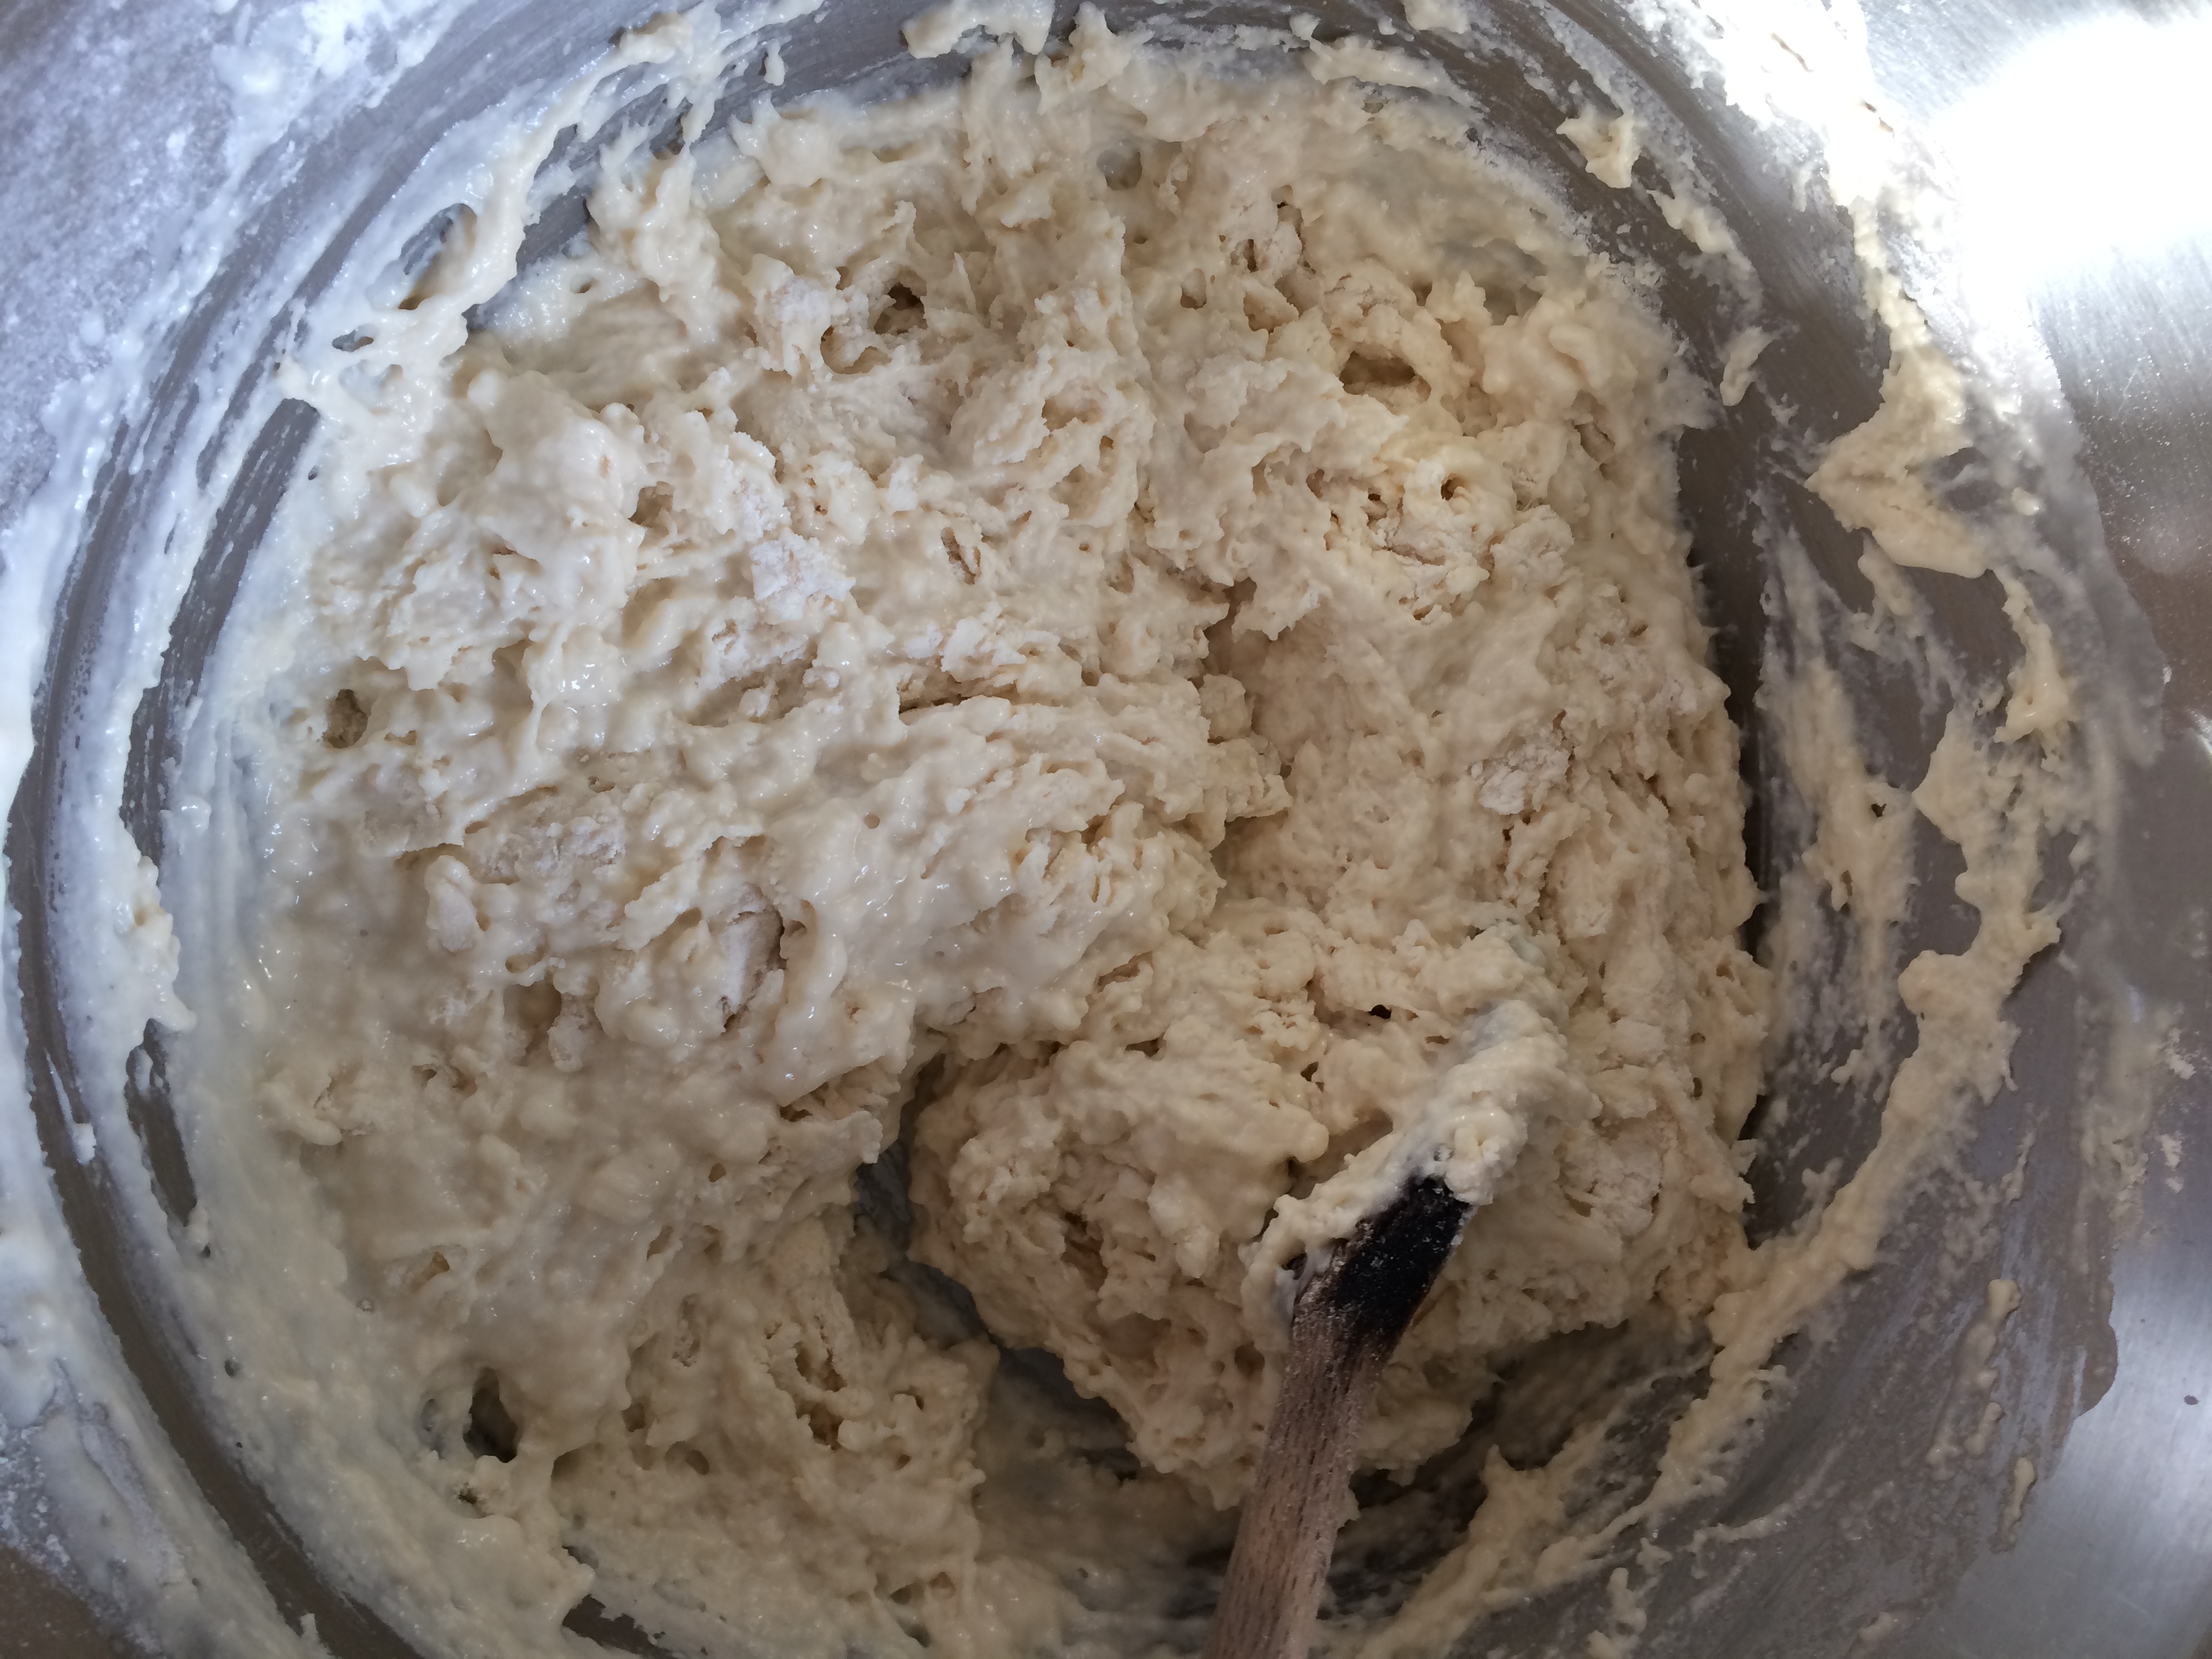
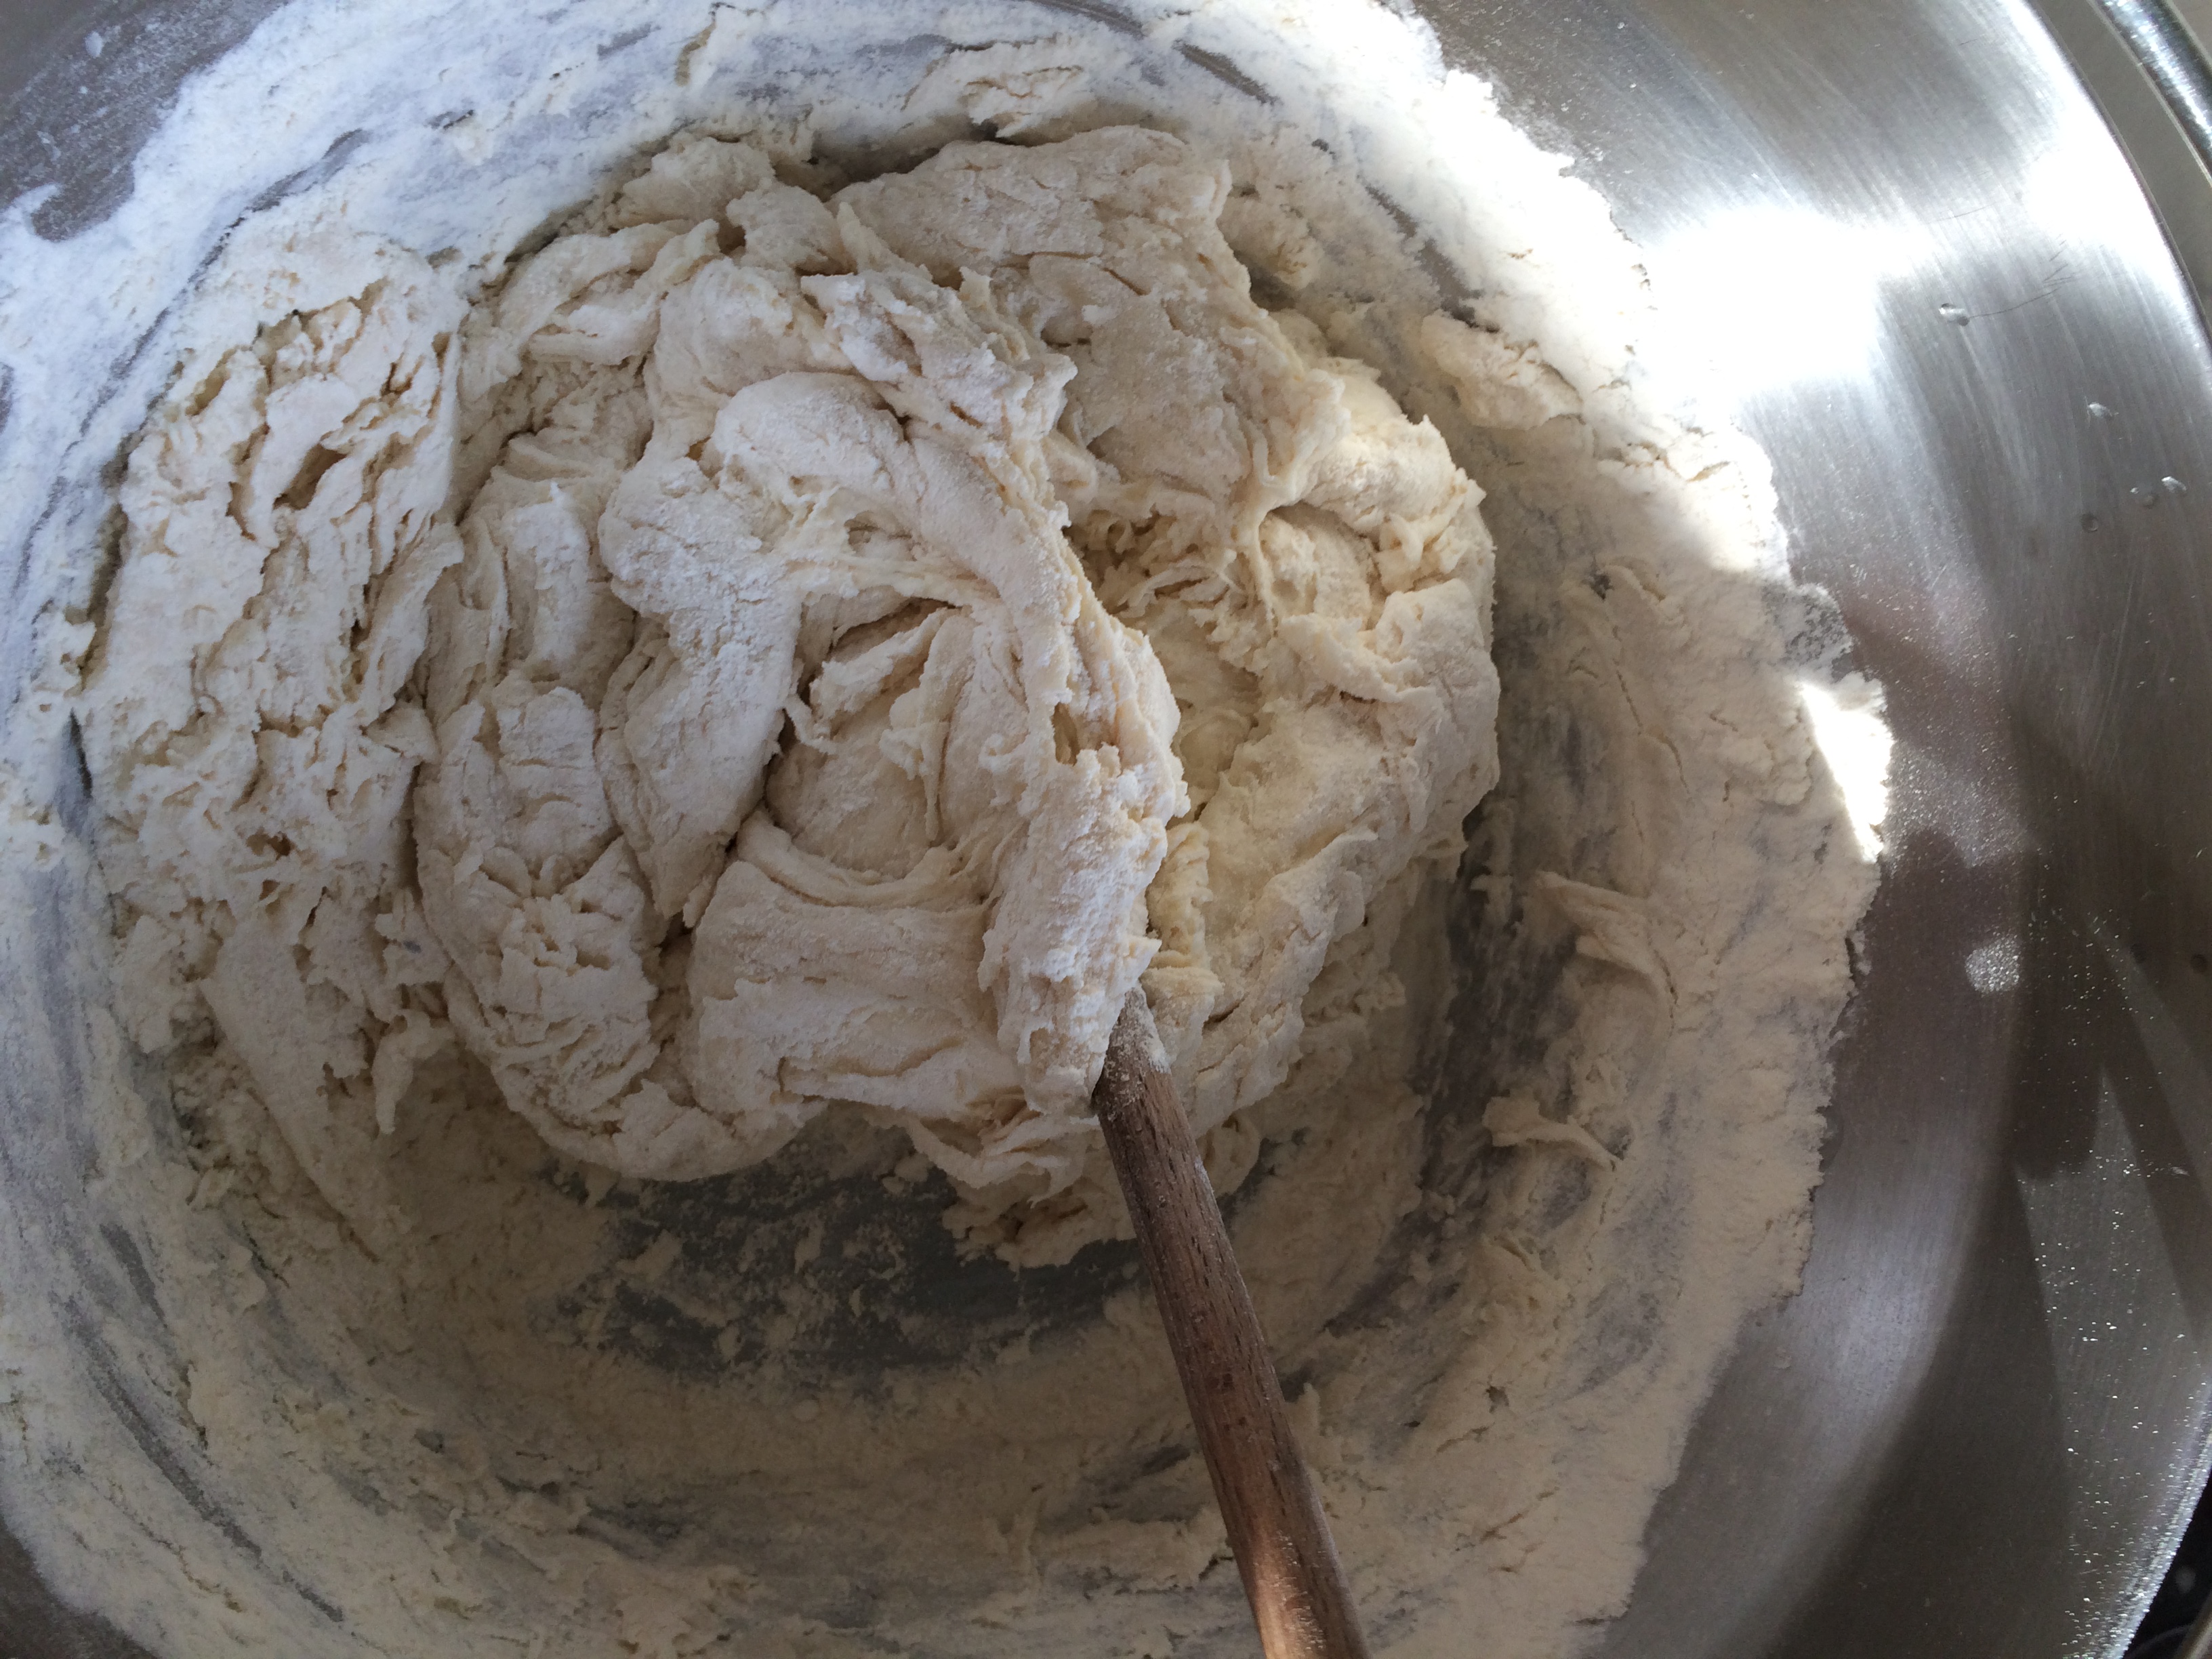
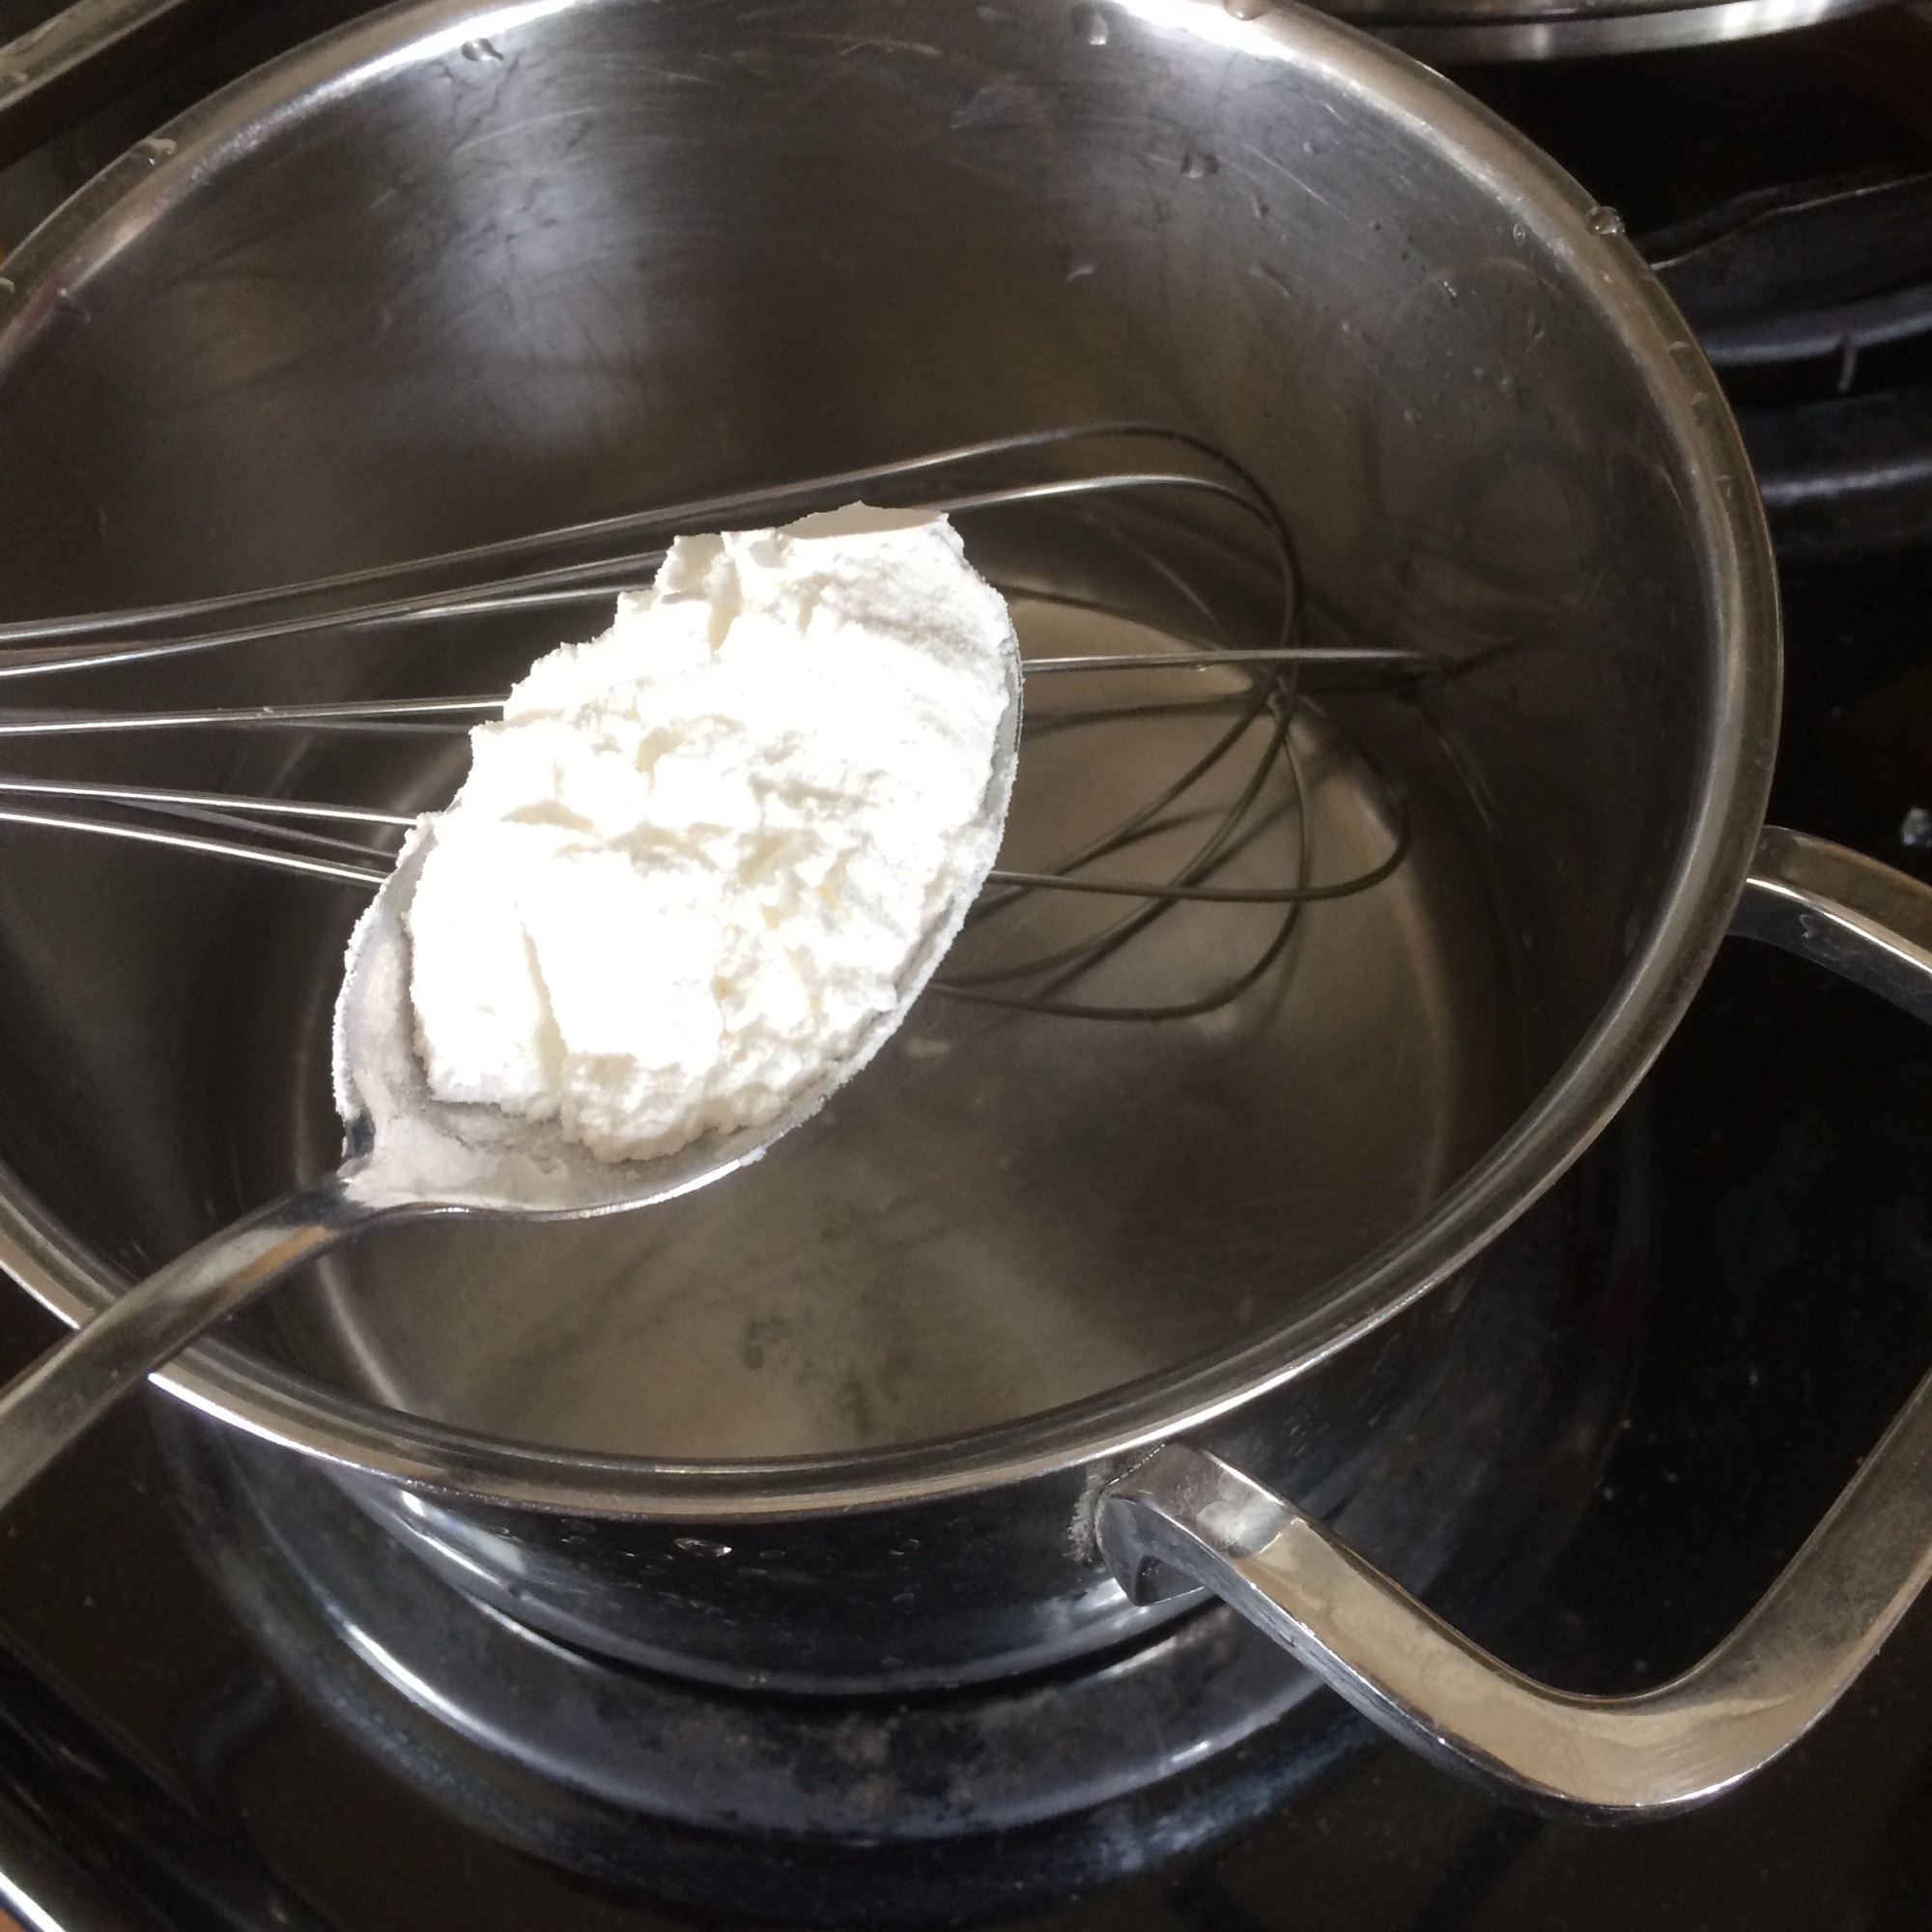
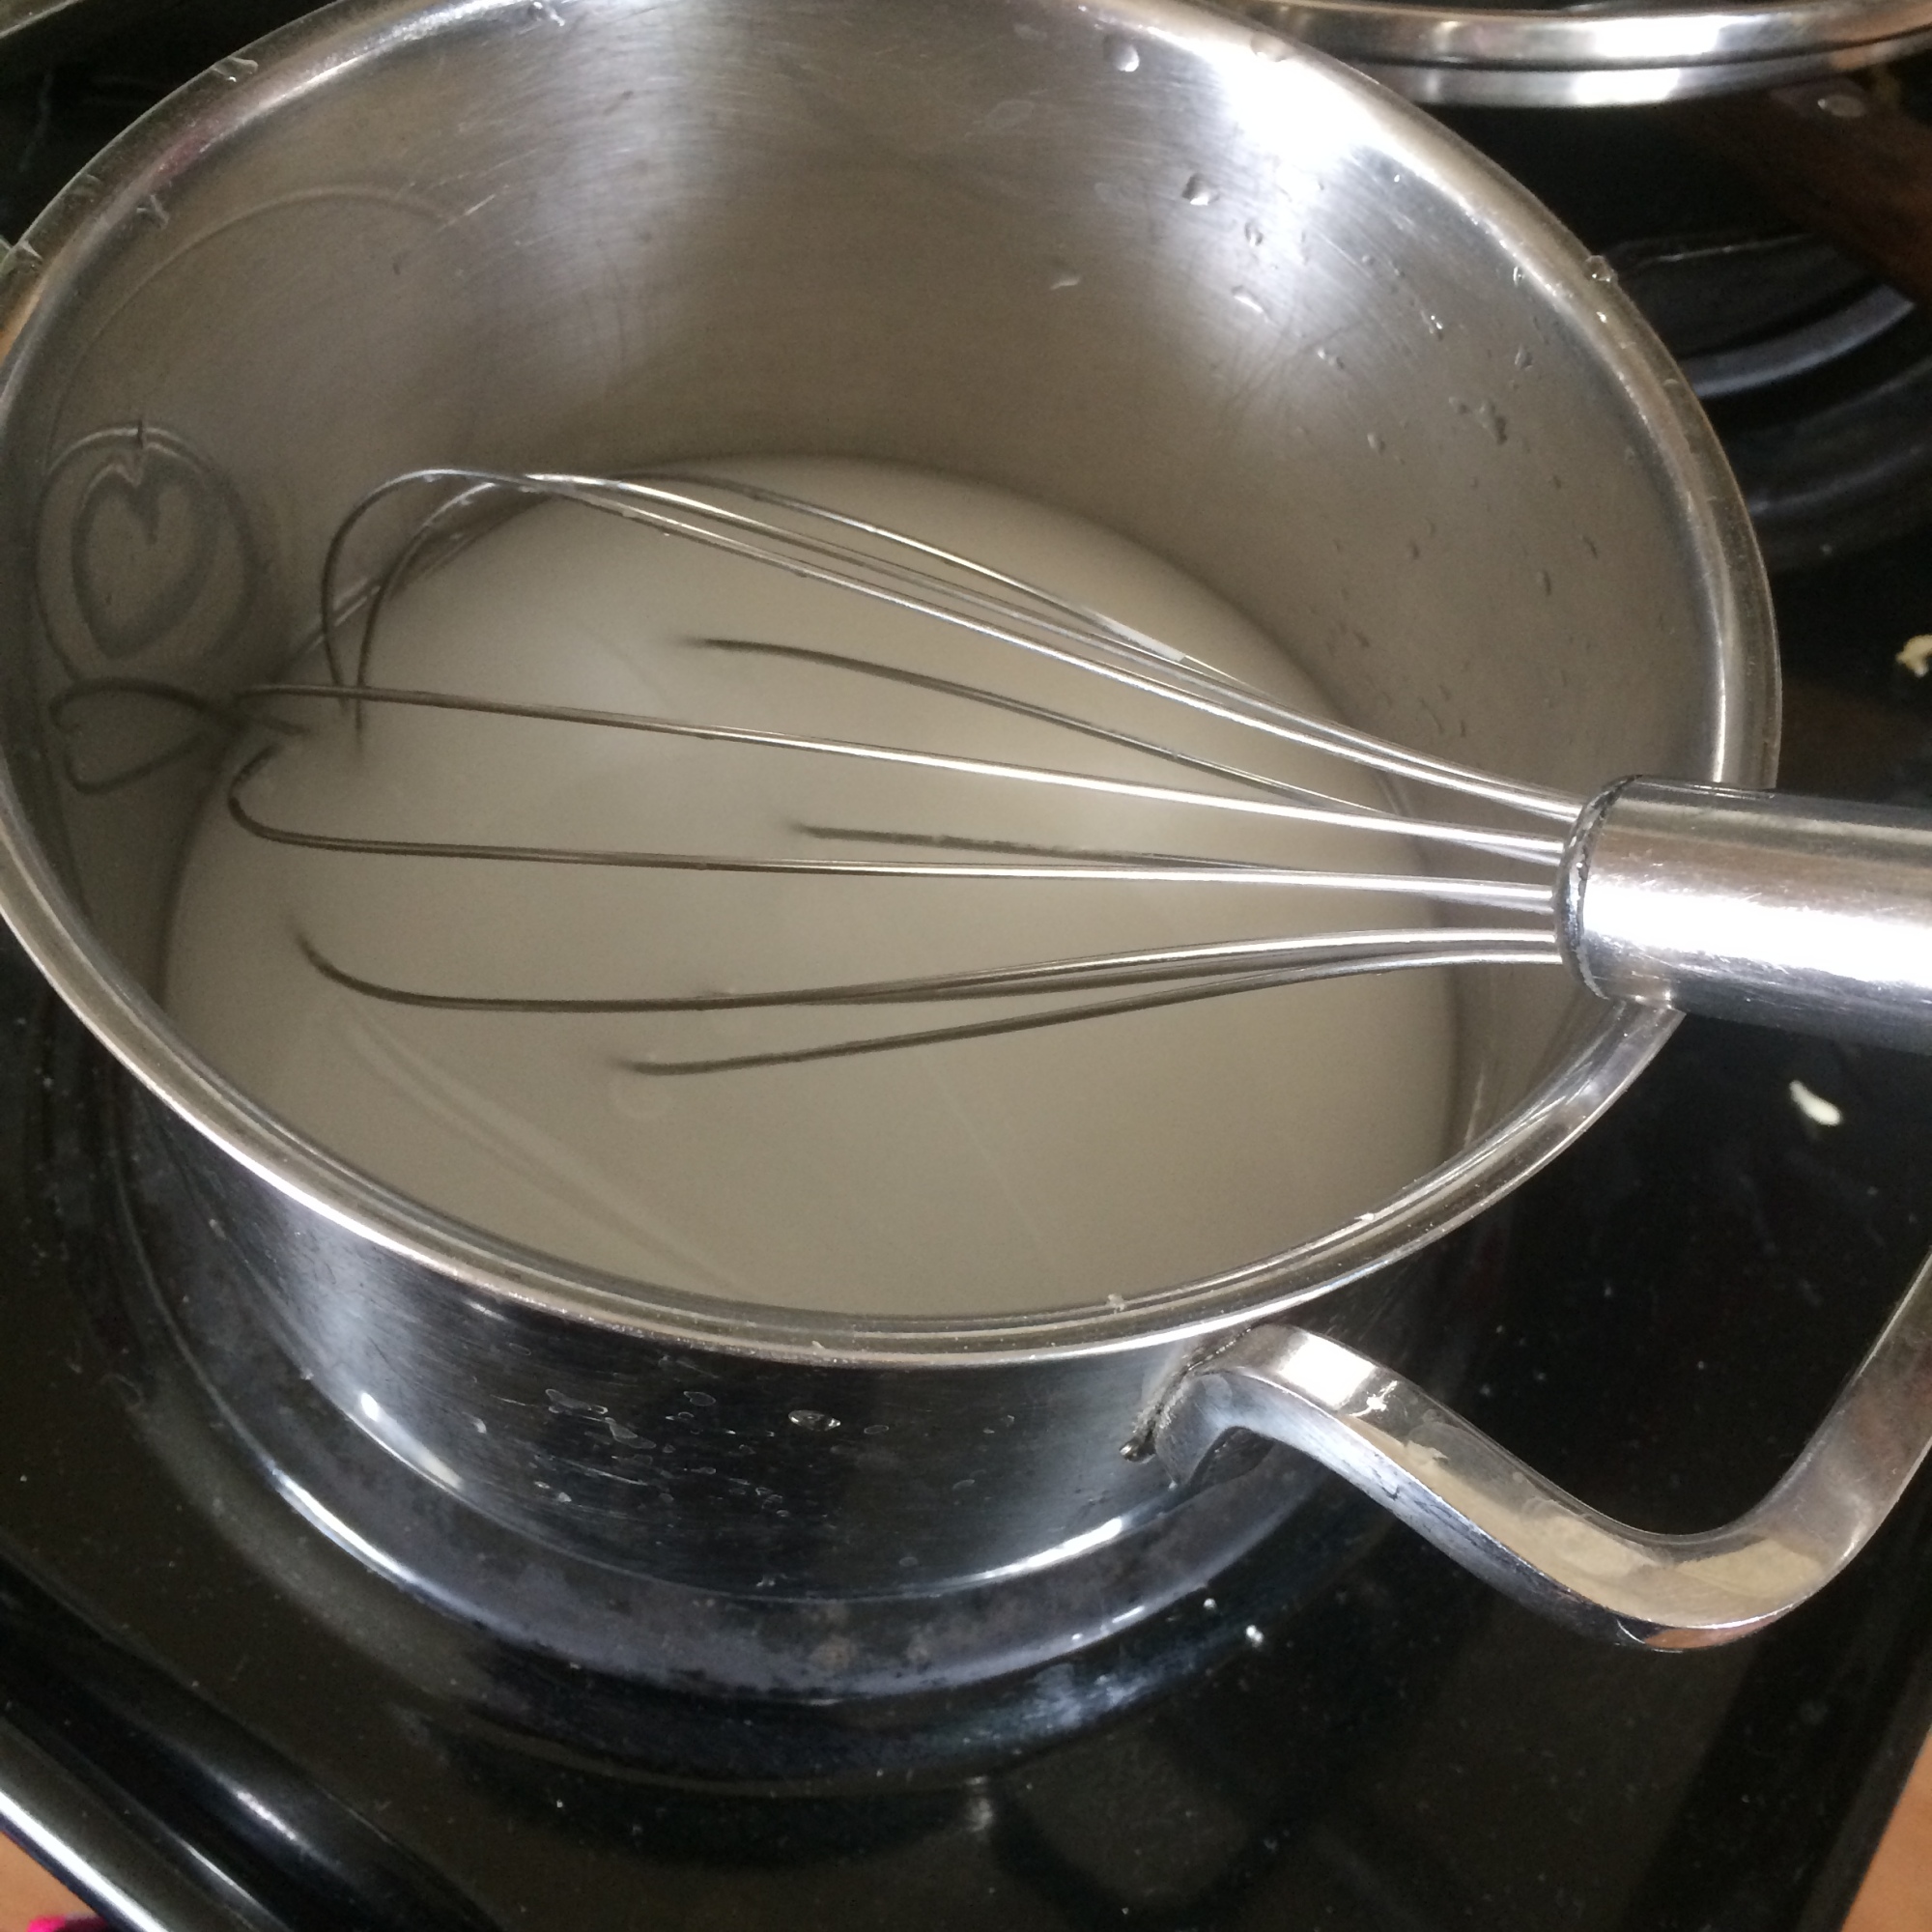
The porridge is the liquid that the vegetables will be immersed in. Maanchi makes it a lot thicker. I think mine could be better a bit thicker too, but since it’s not the traditional kimchi with the entire leaves of cabbage, this works alright being a bit thin.

Use about 3 cups cold water to 10 lbs cabbage. Put it in a pot with starch. I use cornstarch. Whisk it and boil it so it thickens. Maanchi uses sugar. I never have and we like it anyway. Then let it cool.

Once it has cooled, add the fish sauce or soy sauce (or a combination) at a ratio of 1 cup to 10 lbs cabbage.

Then add the spices. I use maybe a few teaspoons of hot pepper flakes, a couple teaspoons of cayenne pepper, and a few teaspoons of paprika. The paprika is for colour. The other two are for the spice. If you don’t like it so spicy then don’t use as much of the hot ones.

The vegetables I have today.

While the porridge cools, chop the vegetables. (You might notice that I’m already putting them directly in the porridge in these photos. By the time I can get to the chopping the porridge has already cooled.)

Pretty colours!

Now when the cabbage has soaked with the salt for the hour and a half, rinse it well with cold water and let it drain.

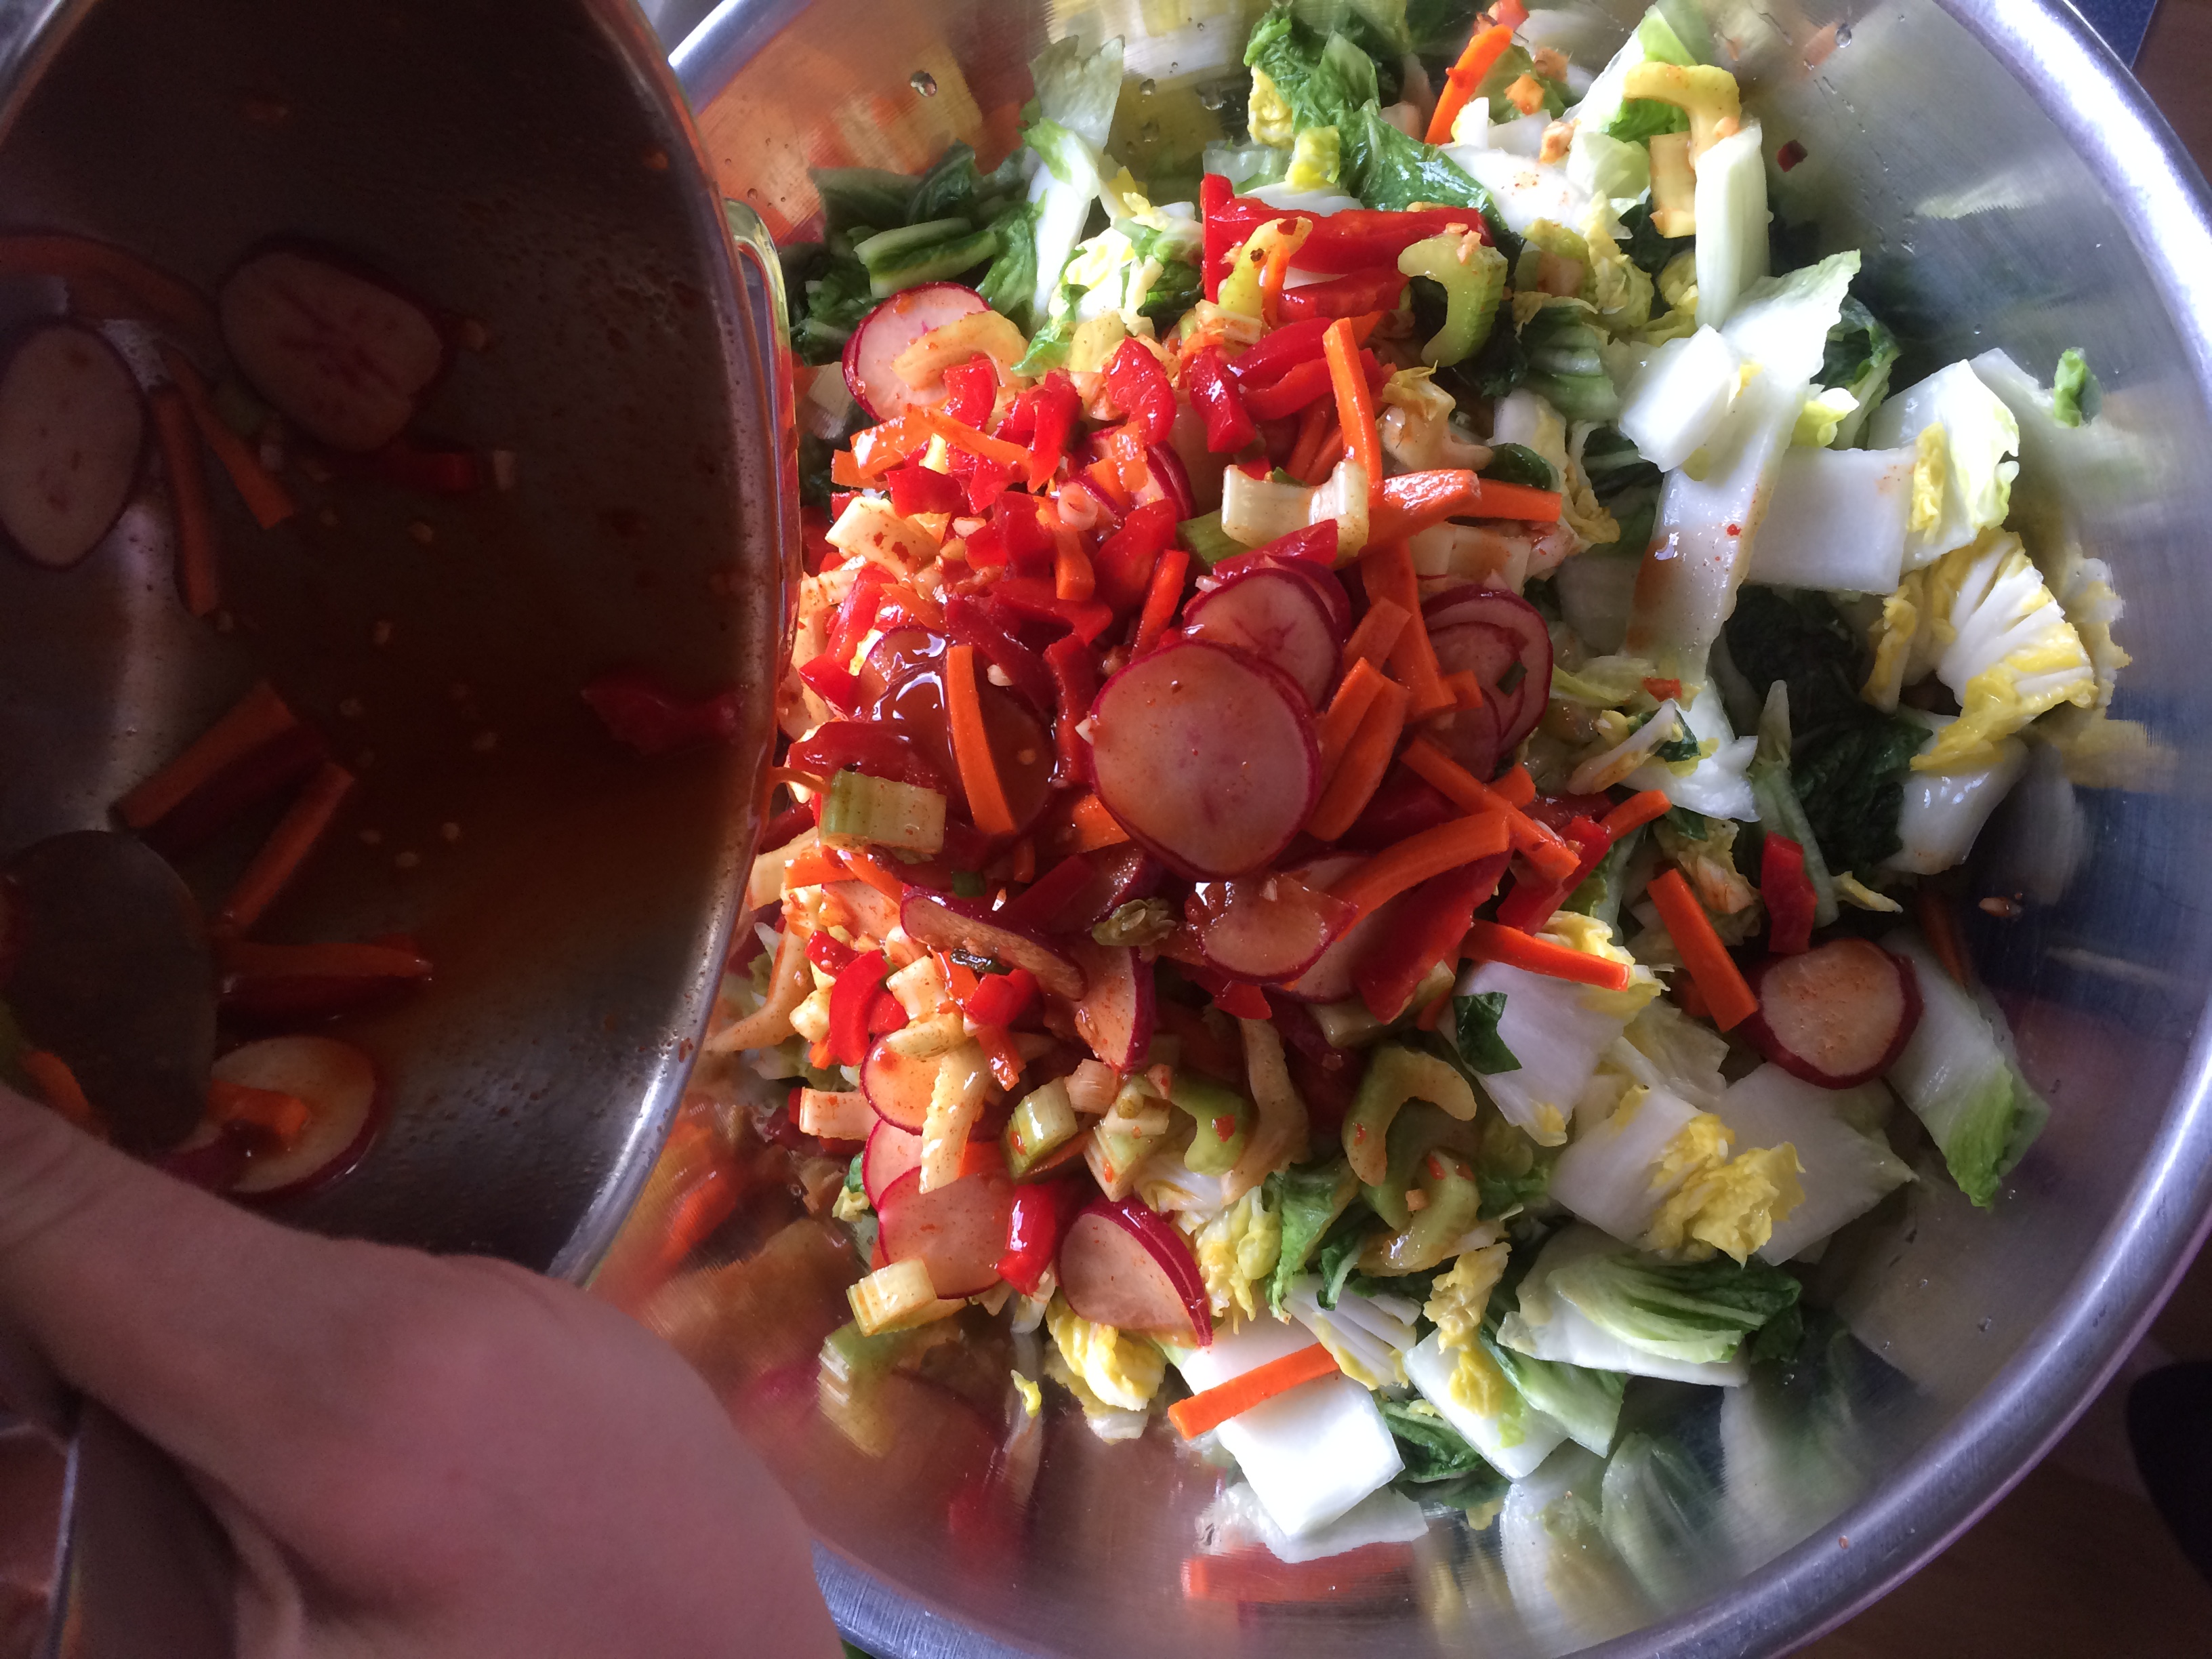
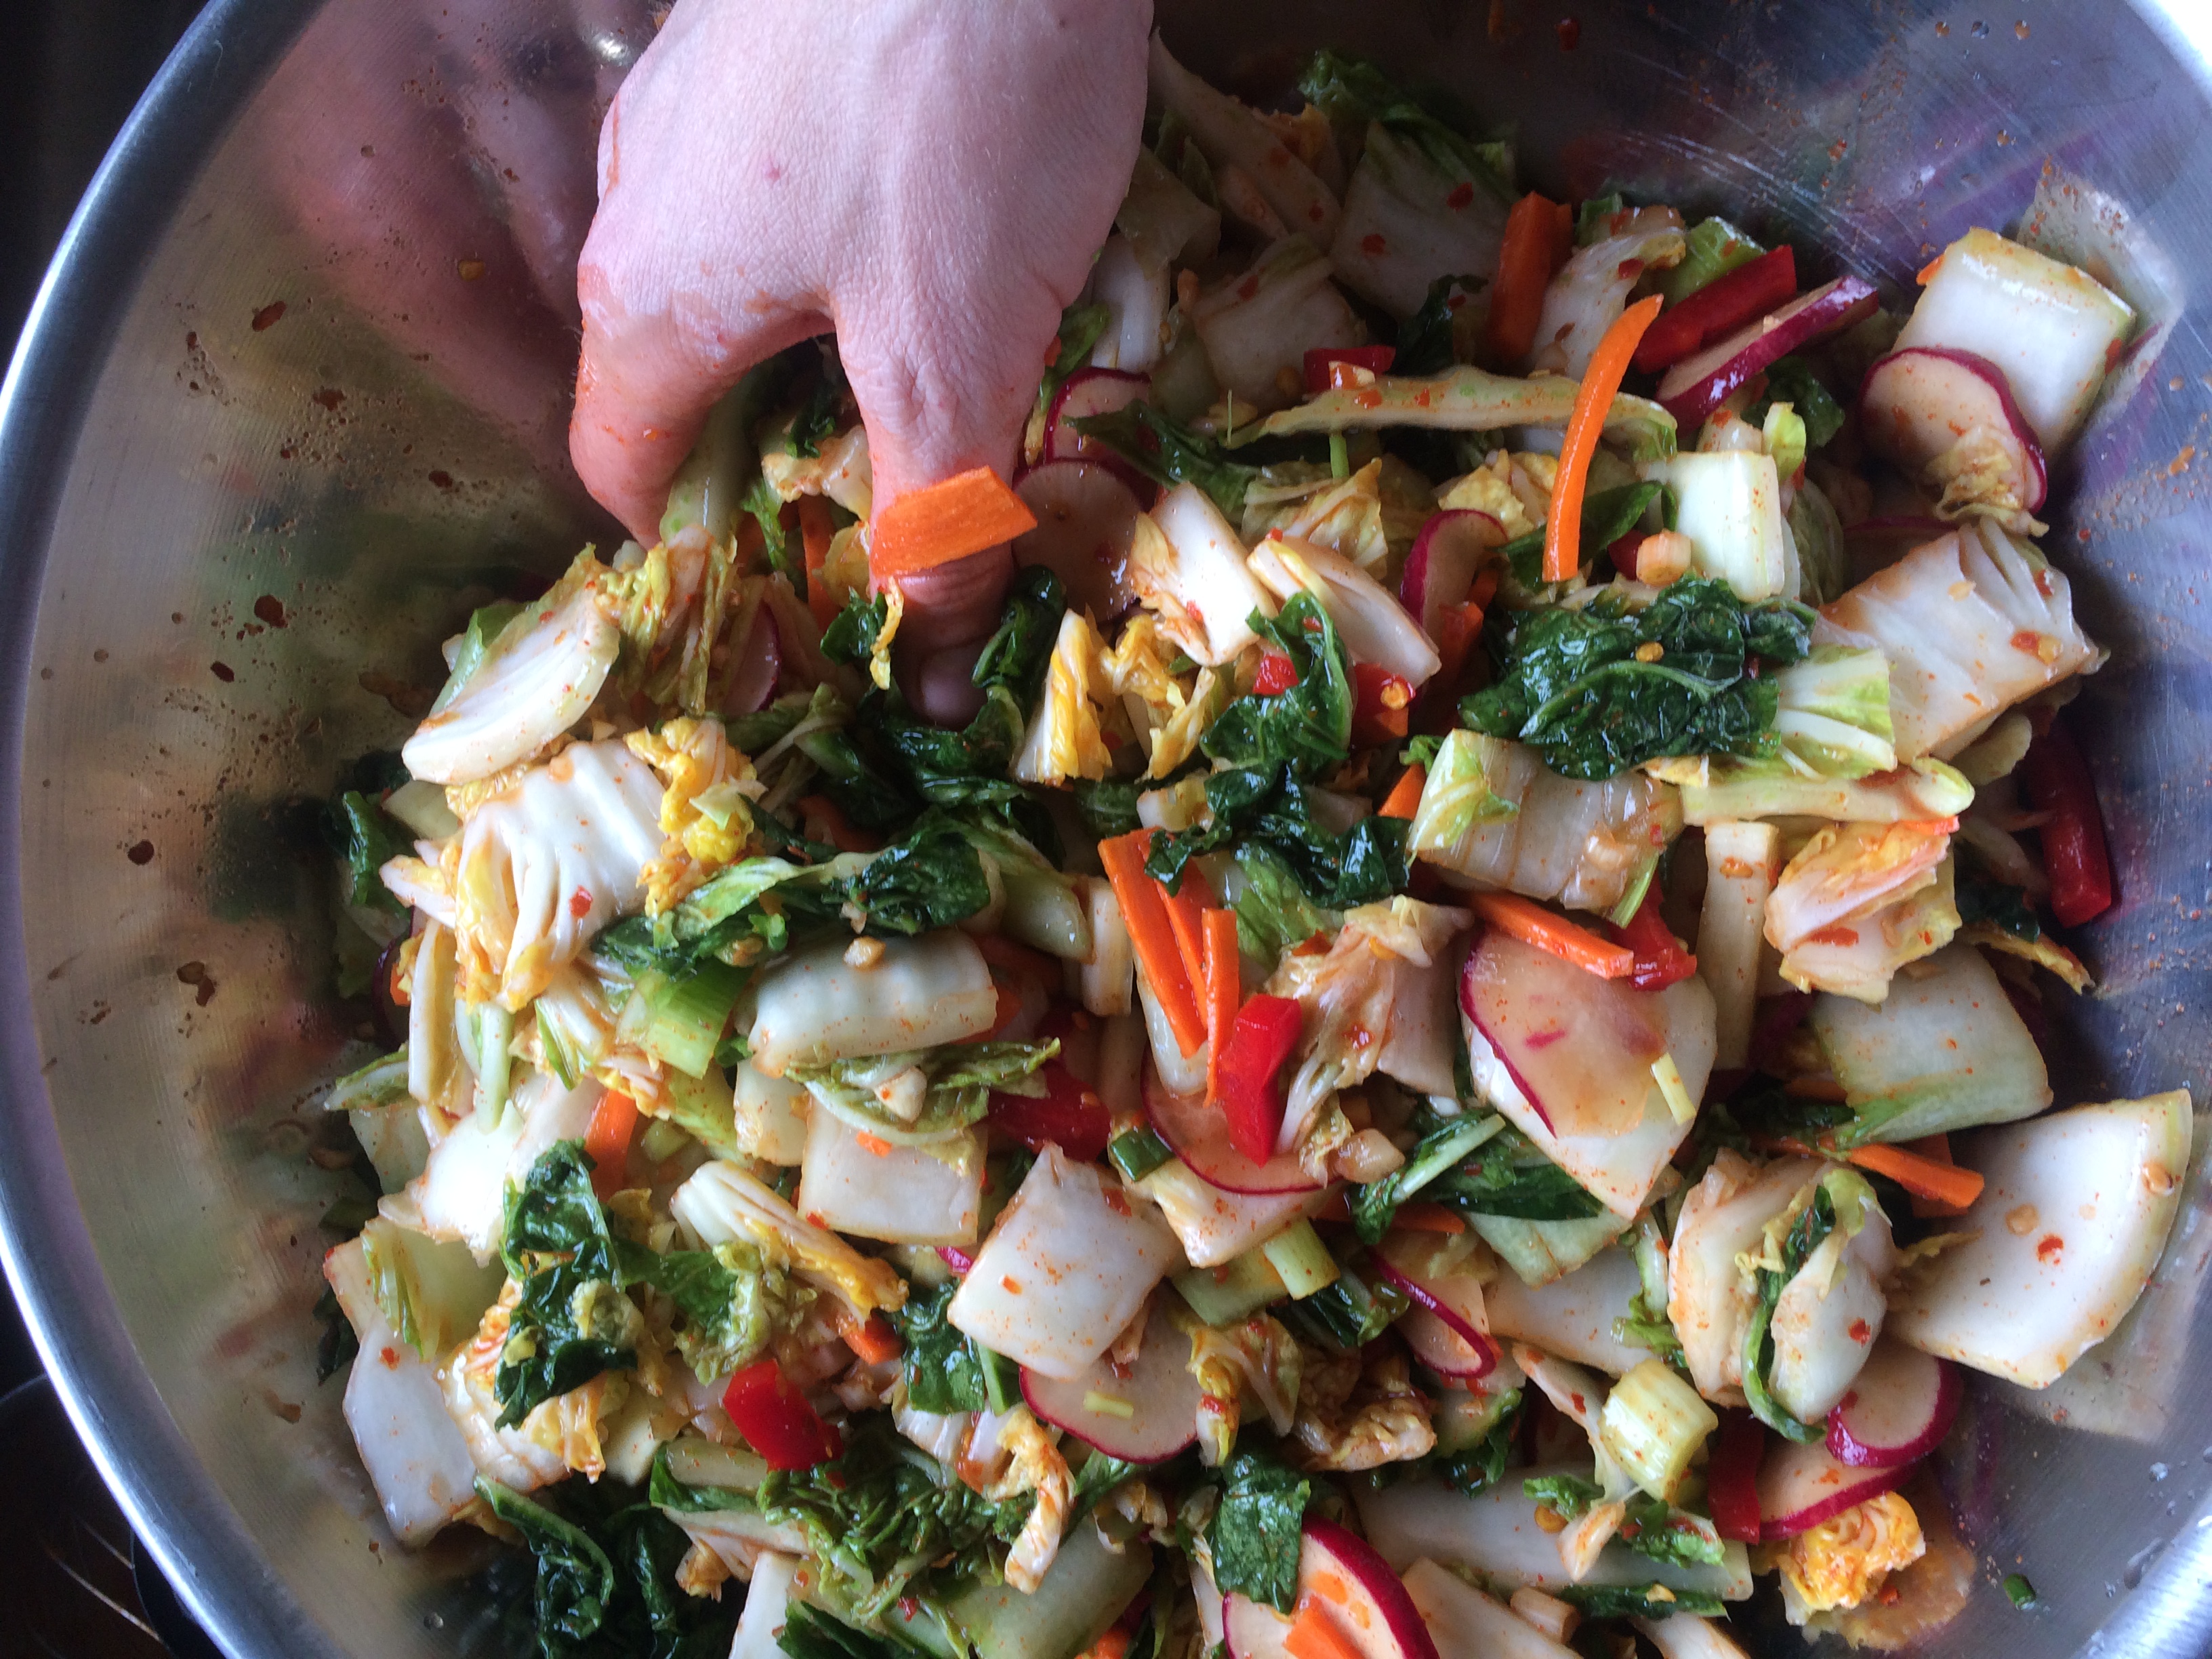
Mix the well-drained cabbage with the porridge and vegetables. This time I mixed them in a big bowl; with larger batches I sometimes just pour the porridge and vegetables into the cabbage in the sink after it has drained (with the drain closed!) since it can hold a lot and you only lose a little of the liquid in the drain area.

And finally, stuff it into the jars! Try to make sure that there aren’t too many bubbles around the vegetables- you want them surrounded by the juices. Leave a little space at the top because it will get bubbles in it and possibly overflow when it ferments. Put the lid on and set it in a safe place on the counter.

All done for now! You can eat some right away, but make sure the utensil you use to scoop it out with is always a clean one- you don’t want other weird stuff growing in there!

Leave it on the counter (you may want to have another dish under it in case it does spill over during fermentation.) Depending on how fermented you want it and how warm it is in your house, it takes about a week for it to ferment. After that keep it in the fridge. It will keep for months in the fridge.

If it gets a little mold on top you can just scrape off a layer.

We like to eat kimchi with rice or other rice dishes, scrambled eggs, and macaroni and cheese. You can add some to a soup or stir-fry, and I really like using the juice to make a stir-fry sauce: I put a large tablespoon of honey in the pan with the fried meat and veggies, and separately mix some kimchi juice with soy sauce and some cornstarch. Then I pour the mixture into the pan and stir it all up on medium heat (right in with the veggies!) until it’s thickened. Yum yum!

Bagels Yum

This is how I am making bagels these days:

I don’t use a proper recipe; it’s just a variation on my regular sourdough bread dough.

I start with boiled and mashed potatoes (about one medium potato for a batch this size.) Well, really I start with fairly hot tap water and about a tablespoon of honey, since the honey needs to be melted.  Then I add about a tablespoon of salt and maybe 1/2 to 3/4 of a cup of sunflower oil. And then the cooled mashed potatoes.  And then the starter. The amount of starter varies.  Stirred down it’s probably about a cup.


Then I add flour.  Yesterday I used mostly whole wheat, with some quick oatmeal and a bit of white (unbleached all-purpose) flour.  I keep adding flour until it gets nice and stiff.  Stiffer than you’d do for normal bread.


(Here I also added cinnamon and raisins.)

Once I have a nice stiff dough I put it in my covered pot (which is actually the bowl I just mixed it in) and put it in the warmed oven and let it sit for about two hours.


Next I get the dough onto the counter in a nice even blob and cut it into 16 fairly even pieces.  I roll them into balls like buns.  Then I let them rest while I oil the two cookie sheets and wash the pot/bowl.  Once they’ve sat for a bit and relaxed I poke holes in each one and set them on the cookie sheets so that they won’t touch each other.  Then I cover them with oily plastic (bags that are cut open to be plastic sheets) and put them in the fridge overnight.


The next morning I start by taking the bagels all out of the fridge so they can warm up a bit, and I start half a big pot of water boiling with maybe a teaspoon of honey added to the water.  I also get the oven heating up to about 475 f.

(Here you see bagels in the pot, which is the same one I mixed the dough in, and then the unboiled bagels on the bottom left and the boiled ones on the top right.)

Once the water is boiling I put in three or so bagels.  They’re supposed to be dense so they should settle to the bottom first and then after a bit rise to the top.  I flip them over and let them be in the water for about two minutes at least.  Then I take them out with a slotted spoon and put them back on the oiled cookie sheets.

Once there’s a sheet full and the oven is hot I put them in the oven and let them bake until they look nice and browned.

IMG_6467

A good breakfast for me and baby:IMG_6468

And these are yesterday’s, so they have oatmeal in them instead of raisins.

IMG_6438


Sourdough Stuff

img_5932.jpg
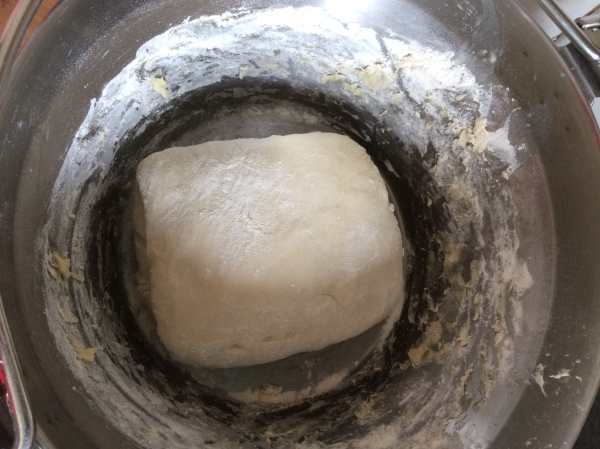
Here are some of the basics of sourdough that I’ve learned.

You can start your own starter. Expect it to take about a week. Then as long as it gets fed at least every few weeks you can just keep it in a jar in the fridge and it will be fine. My favourite place for advice is http://www.sourdoughhome.com

You can make all sorts of things from sourdough. Some things I’ve tried successfully that are normally made with yeast are normal white bread, pizza crust, sweet bread and buns, even cinnamon raisin bread and a version of pannettone!

You can also make all sorts of things with the starter that are not normally yeast doughs.  Pancakes and waffles made with starter are the best! You can also use starter in muffins, flour tortillas, crackers and cookies. I’m still in the experimental stage with cookies and biscuits. Actually, I’m just generally in an experimental stage period. Sourdough is an adventure!

Anyway, here are some pointers for getting specific results from your dough:

If you want:

Higher rise/fluffier bread:

  • Let it rise longer (this will give it a more sour flavour) and/or
  • Let it rise at a warmer temperature and/or
  • Use more starter

Quicker rise:

  • Use more starter (the dough will be less sour) and/or
  • Let it rise at a warmer temperature

Less sour flavour:

  • Use more starter and/or
  • Get the dough to rise faster.

More sour flavour:

  • Use less starter. You will need to let it rise for longer.
  • Lower rising temperature. Some people leave the dough in the fridge overnight.

Moister bread:

  • Less flour, so stickier dough
  • Add a mashed potato or two. This has worked wonders for me!

Crustier crust:

  • Moisture in the oven while baking. I’ve tried baking a loaf in a Dutch oven, but I can’t remember that it turned out particularly well. I’ll have to try it again. What I’ve done more often is boil a kettle while the oven is preheating, and then just before I put the loaves in I put a metal cake pan on the bottom rack with a cup or so of boiling water in it. The steam apparently makes the bread get a thicker crust.


Here is my usual approximate recipe for bread, which I adapt to the circumstances:

Time: around 10 hours, start to finish.

Yield: Approx. 4 medium loaves

Ingredients:

  • 2 Potatoes, boiled
  • Water from the potatoes plus about 4 cups lukewarm water*
  • About 3/4 cup live starter
  • 1/3 cup oil (I use sunflower.)
  • 1 Tbsp salt
  • Flour. Maybe 7 or so cups? I use unbleached all purpose.
  • Honey if I want sweet dough. About 2 Tbsp.

*The temperature of the dough should be lukewarm. So the temperature of the potatoes+the temperature of the water+the temperature of the starter should = lukewarm. (If the starter was in the fridge use warmer water, but if the potatoes are still hot use cooler water, etc.)

Method:

Boil two peeled and chopped potatoes, and mash. OR: Add all the water to the boiled potatoes and blend it thoroughly with a stick blender.

Put potatoes with all the water, starter, oil and salt (and honey, if using) into a bowl. Mix. I like to use the stick blender again because it’s fast and thorough and already needs to be washed.

I turn the oven on to warm for a few minutes at this time because I let the dough rise in there.

Add a few cups of flour and mix with a wooden spoon.

Add flour a cup or less at a time, mixing with the wooden spoon until it’s too hard to use. Then mix by hand. I can usually get away with just using one hand on the dough since it’s not a huge amount.

When it’s a stiffness I like (somewhere between sticky and dry/tough) I let it rest.

Now there are two options:

  1. Knead the dough after it has rested for a few minutes and cover it, put it in its rising spot and leave it alone.
  2. Cover the dough, put it in the rising spot for 45 minutes, do the stretch and fold, put it in the rising spot for 45 minutes again and then stretch and fold again, and then put it back to rise and leave it alone.

Either way, I time from the beginning of mixing for six hours and then shape the loaves.

[Don’t forget to feed the starter! If you accidentally used it all up, don’t worry. Put equal amounts (by volume) of water and flour into the container and let it sit. It will take longer, but as long as there was a wee bit of starter still in there it will survive! I’ve heard of a woman having a wooden bowl that she always used for bread, and she didn’t use any starter or yeast- the stuff that was in the pores of the bowl was enough!]

I usually make four or five smallish loaves in loaf pans. The pans are greased, but I don’t need to re-grease them unless I wash them.

Now I like to brush a bit of oil on top of the loaves and cover them with a cut open plastic bag. I let them rise in the slightly warm oven too.

After about three hours I take the loaves out, preheat the oven to 400 F and put them back in. Once they’re in I turn the temperature down to 365 or so. I figure the actual temperature will coast down. I time them for 30-35 minutes.

As soon as the bread comes out of the oven I take it out of the pans and set it on a rack to cool, covered with tea towels. Once it’s cool I put it in bags and whatever I’m not going to use within a day, I freeze.

Sourdough: Basic Bread Dough; English Muffins. And Foccacia.

Today I decided to try making English muffins for the first time. The dough is pretty much the same as a sweet bread or bun dough. I don’t generally use sweetener in my bread, but otherwise it’s the same as bread dough too.

IMG_6112

I start with a potato. If I’m making a regular sized batch of bread I usually use two medium sized potatoes. I peel and boil them so they’re good and soft (mashable.) Sometimes I do it the night before but sometimes I do it right before I make the dough.

IMG_6114

Here I’ve got my stuff ready. Once the tater is boiled I add all the water I’m going to use and blend it with a stick blender. You can just mash it but the blender is fast and thorough. *The water plus the potatoes plus the starter should end up lukewarm. So if the starter is straight out of the fridge I use warmer water, but if the potatoes were just boiled (and still hot) I use slightly cooler water.

IMG_6115

Next I add the starter, honey, a glug of sunflower oil and salt and blend it again. You don’t really need to blend here, but it’s fast and the blender needs to be washed anyway!

IMG_6120

Around this time I turn my oven on to “warm” and put the rack lower so my bowl will fit.  If it’s warm in the house you can let it rise on the counter; I’ve also heard that the top of the fridge can be a good spot.  But it’s winter and our house is quite cold (around 64 F or 18 C.) so I use the oven and it works well.  I leave it on “warm” for five minutes and then shut it off.  If the oven light worked I would turn it on and leave it on while the dough was rising, but it doesn’t. So it just coasts.

IMG_6121

Anyway, then I add flour.  I’ve been using No Name All Purpose or Unbleached All Purpose.  Start with two or three cups, depending on the size of batch, and then once you’ve mixed it well add a cup at a time to see how stiff it’s getting.  I goofed a bit here by adding two cups at once and it was almost too stiff but not quite.

IMG_6122IMG_6123IMG_6124

IMG_6125IMG_6126IMG_6127

Then I knead it roughly, usually just in the bowl with one hand.  The oven is off now, so I put the cover on my bowl (which is really a big jam pot) and pop it in the oven. If you aren’t using a big pot you can cover the dough with a bag, cut open if necessary, and a tea towel.

Next I let the dough rest for a bit. Here there are two ways of dealing with the dough: traditional kneading, which is good and I always did until recently, and the new “stretch and fold” method.  They are both good.  If you have to go away then go with the kneading, but if you’re around anyway then the stretch and fold is easy. (I can do the stretch and fold with the baby on my hip, so it’s easier than kneading.)

If you are going to go with the kneading method, let the dough rest for a few minutes here and then knead it, put it in its rising place and leave it until it’s double or so in bulk.  (For me that’s usually six hours.)

OR- for the stretch and fold method, which I am using today:

I set a timer for 45 minutes and pop the dough in the warm oven (its rising place.)

IMG_6128

* Now is a good time to feed the starter, while everything is still out and messy!

After 45 minutes I take it out. It hasn’t really changed in appearance or size yet. That’s fine.

IMG_6129

I flour the counter, dump out all the dough and stretch it out flat.


Then I fold one third over the center,

IMG_6132

And then the other third (just like a letter.)

IMG_6133

Then I flatten it out again and do the same thing sideways.

I end up with a nice squarish blob. If it’s softer dough (had I used less flour) I sometimes fold it in half again here. Then it goes back in the bowl, covered, and into its rising place.  I set the timer for 45 minutes again.

IMG_6137

Again, the dough hasn’t changed much in size or appearance, but you can feel that it’s softer.  I stretch it out on the floured counter and fold it the same way as before. It’s getting pretty smooth now.

It goes back in the covered bowl in the rising spot.

IMG_6141

Now I leave it alone (unless I feel it needs more mixing, in which case I’d repeat the 45 minutes and fold once more.)

I generally have good luck letting the dough rise six hours from the beginning of mixing, shaping it (loaves, buns, etc.) and then giving it three more hours until baking time.  So if I start the dough at 8 AM, even if it takes until 10 AM to get all the stretch/folding done, I start calculating the 6 hours at 8 o’clock. In that case the dough would be ready to shape around 2 PM and to bake around 5 PM.

IMG_6143

Now the dough is nice and big and light (not necessarily twice its original size, but that’s because its six hour rise was interrupted with the stretch-and-folds.)

If I was making buns or loaves this is when I would shape them and let them do their last rise before baking.

But today it’s English muffins, so here we go:

I rolled out the dough, half at a time. You can see my fancy equipment for cutting out the circles. They turned out a bit smaller than I’d like so next time I’ll use a bigger can! They also shrunk a bit right after I cut them because the dough was still stretched. If I had waited a bit after rolling it out the dough would have had time to relax and they would have stayed more round.

Anyway, I made way more dough than I needed for a nice batch of English muffins, so the leftover dough got turned into foccacia. It was quite good, but it’s better with an unsweetened dough. That being said, the sweetened dough would make excellent pizzeria-style garlic or cheese fingers.

Basically the foccacia is flattened dough pressed into a greased pan, left to rise, and then topped with a mixture of crushed garlic, olive oil, salt and herbs. I used an “Italian Seasoning” mix; mainly you want rosemary, basil and oregano.

But back to the English muffins! They had their second rise, and then got “baked” in a dry (no grease) cast iron frying pan.  Normally you would use cornmeal to prevent them from sticking but I didn’t have any so I just used flour and it worked fine. It takes about 10 minutes per side, on medium low.  I’ve read that if the insides aren’t done then you can finish them in the oven, but I didn’t need to.

And voila!

IMG_6163

Okotoks

Okotoks, or the Big Rock. My first visit to the thing my new home is named for.
Okotoks, or the Big Rock. My first visit to the thing my new home is named after. There is an opening down the middle of the right hand rock that you can easily walk through and even climb up on top. It’s bigger than a house.

How Not to Build a Wood Oven in Your Backyard

This is how I built my wood-fired bread oven in my (rental- shh!) backyard.  Now I just have to wait for my forearm splint to heal (thanks to being unaccustomed to doing masonry) before I can build a metal birdcage and use some actual cement to put the top back on.  At least the bread that was meant to be baked in there turned out well enough in the electric oven that I’ll be able to eat for the next few weeks!

Rockies

IMG_7998One of the pictures I took on one of my hikes in the beautiful Canadian Rockies this past summer.  This was near Burstall Pass.

Blog at WordPress.com.

Up ↑